13. Once you're logged into your blog (make sure to choose the beta version, or you'll receive an error saying that your username doesn't exist), and move to the Posting | Create Screen. The little icon of a picture is what you'll want to click, which takes you to the uploading menu.

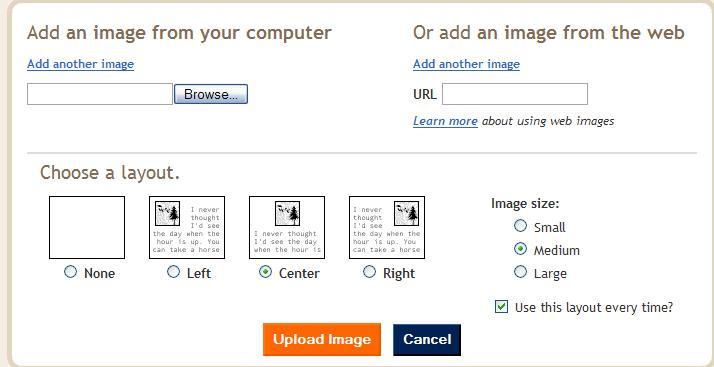
14. From the upload menu, you'll want to click on the Browse button beneath the heading of Add an image from your computer. You can upload images from the web, but issues of bandwidth, copyrights, and broken links will become issues. These will be discussed in a later posting. It's easiest to upload files from your computer from now.
Once you've hit browse, Windows Explorer will pop up and you can determine where the image is located. (If you're unable to locate a particular image, bring up Picasa, find the file on Picasa, and right click when the picture is in the picture display window. A menu will show up where you can select "Locate on Disk." This will bring up Windows Explorer showing you exactly where the file is located.)
Once you've selected the file, you can determine how you want the picture to be displayed on your blog. Blogger's examples show how the text and the pictures will interact. The image size option refers to how large the picture will look on your blog, and will not change the actual image. The checkbox allows you to maintain a consistent look to your blog, if you choose.
Once you've finished those steps, click on the Upload Image button and wait. You'll be redirected to a new screen which shows the progress of your upload. You'll receive a confirmation scren which shows that your photos are added, and this will display a preview of the image. Click done, and it will take you back to the Posting | Create screen.
If you're on the Edit Html tab, you will see lots of odd formatting. Be careful not to erase any of this. HTML tags, which are all of the brackets "<" and "/>" need to be balanced and symmetrical. Every start bracket "<" needs an end "/>" to determine when the special formatting stops. If you erase one, your page will display errors. If you're new to HTML, it's easiest to use the Compose tab. Then, you can treat this post like any other text-only post.
If you're going to add multiple photos, remember that blogs work with reverse chronology. If you have three pictures, you'd want to upload the third picture first, then the second, and the first.
No comments:
Post a Comment