8. This is the top row of Picasa. It's a beta version, which means that it's apt to have quirks and unexpected "features." The row of toolbar links are laid out in a standard way, and offer different options for working with your images.
The Import button allows you to add more photos to Picasa, and will guide you through that process, whether you've saved photos on your computer or are using a flash drive.
Slideshow offers you a way to see your currently selected folder in a large format. It displays the contents of that folder as large images on your screen with controls provided at the bottom.
Timeline displays your pictures by the dates associated with them, and not always the date that you added it to Picasa. If you have a picture from 2003, but added it yesterday, Picasa shows that picture as being in 2003.
There is a search feature with a truly neat option. To the right of the search box, there is a tab with a pulldown menu. If you click that tab, you can use a sliding bar to find pictures that you've added. If you're searching for a particular picture and know about when you added it, you can view everything added in that time range. Exit Search will take you back to the main window.

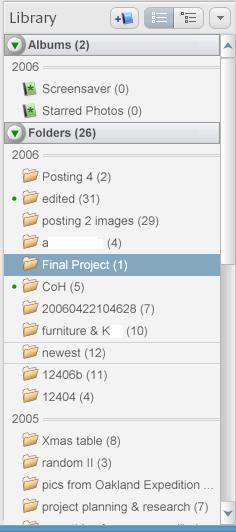
9. The left folder row is your main navigation guide. If you hover the mouse over each of the buttons, it will provide a mini-explanation of what each does. You can see that the folders are broken down by year, and display the number of pictures in each folder. To open a folder, click on it and it will be displayed in the main window. From there, you can select a particular image to work with, or organize your folders. Doubleclicking on a folder in the folder list will bring up a menu to enter more information about that folder.
10. This is a sample of what the picture display window will contain. The photographs are thumbnails, organized by folder. The date beneath the folder tells you when that folder was created. If you click on the folder, it will bring up Windows Explorer where you can edit your files. (Please note that Windows Explorer is different from Internet Explorer.) If you hover the mouse over the words "Add a description," you'll see it change to a bracket. Click once, and you can describe the folder's contents.

11. This is the bottom toolbar. To the far left is the photo tray. You can drag and drop photos there, and if you select a photo on the main screen, it will automatically be added to the photo tray.
The top of the toolbar contains the number of photos in the folder selected, its creation date, and how much disk space it occupies. You can tell which folder is selected by looking at the left folder row. The selected folder will have a band of color across it on the list of folders.
The bottom buttons (Hold, Clear, and Add To) contain options for working with the photo tray.
The orange BlogThis! button is where you'd be able to sign into Blogger and upload your photos directly. Hopefully this issue will be resolved quickly.
Collage is a fun effect which allows you to combine several of your photos that you've placed in the photo tray.
The slider to the far right allows you to zoom in and out of the main window, and if you have a single photo selected, of that single picture.

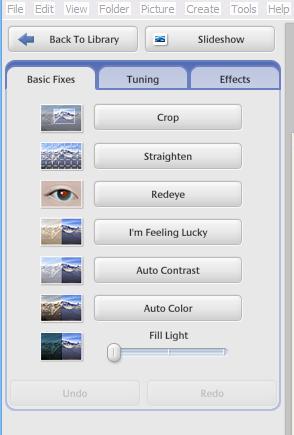
12. Doubleclick on a photo in the main picture display window to select it. The options for fixing, tuning, and creating effects are displayed in tabs to the left of the photo. Be adventurous with these settings, and see how fun it can be to alter the look of a photograph. Ctrl+Z will allow you to undo the settings or effects, as will the Undo button on the bottom of the tab. If you're concerned about permanently altering a photo, email the original photo to your Gmail account where it can remain safe while you experiment.
A set of arrows will let you move between other photos in that folder, and the Back to Library arrow will return you to the main window.
No comments:
Post a Comment