It's easier to see effects than to explain them, and the purpose of this blog is more to show you possibilities than to educate about every tangential subject presented. We'll just skim through some of the things that can be easily done with editing software and websites.
To start, find an image from your Picasa library that you want to change. Perhaps the color of a recent photo isn't as bright and vivid as you'd hoped. Open the photo, and email the original image to your Gmail account. This will help you avoid Picasa being overly "helpful" and saving the changes to your original. If you decide, after experimenting, that the original is better, you can easily download the picture from your Gmail account.
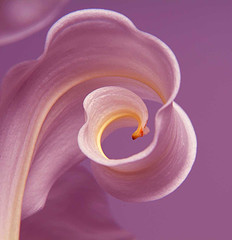
I'm going to be using a Creative Commons licensed photo from the Flickr Color Selectr taken by Zuleyha.
Once you have Picasa's library open, you'll see the Tools menu, which should be somewhat familiar. Perhaps, you've used different settings and effects already.
1.

I'll try to skim some of the more interesting and common features. Perhaps you want to lighten your photo. Move the Fill Light slider and watch your image become lighter as the image below illustrates. The Fill Light slider is in the middle, which means that the flower is 50% lighter than before.
2.
3. The Tuning tab also has a Fill Light slider. The nice thing about Picasa (and most other photo editing programs) is that every action can be undone. All of the effects on the Tuning tab will register as one change. If you click the Undo button, while on this tab, each and every change you've made while here, will be undone.
I decided that the picture is too pink so I clicked on the Neutral Color Picker. Once the eyedropper tool appeared, I clicked on part of the photo, which changed the entire picture. The end results depend where you click.
If you're not adventurous with this step, click on the Magic Wand icons to have adjustments made automatically.

4. Here's the results of the automatic changes.The result is much darker and crisp looking than the original photo which had a lovely, blurry ambience about it.
5. The Picasa Effects tab provides you with thumbnail previews of effects applied to you image. As always, you can undo these changes once you've selected them, along with previous changes.

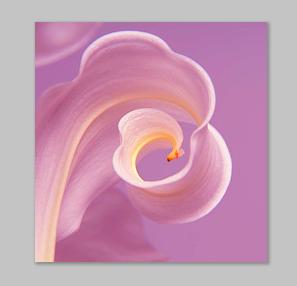
6. Now, I've moved back to the Basic Fixes tab. I've chosen the "I'm Feeling Lucky" option which automatically fixes lighting and color.
This makes the background much more of a rich purple and contrasts nicely with the delicate yellow in the flower. With all of these adjustments, I find myself happy with the way the flower looks. But...that wide open expanse of purple on the right side isn't something that I want to keep.

7. The crop tool is the right tool for this task. Once you have the option, choose manual. You can also use this to resize your photos. Resize is primarily useful to reduce a very large image down to a workable size. You've probably seen photos so large that they fill the browser window - and then some - requiring you to scroll over to see the rest of the image. Resize lets you compress the image.
You will want to select, with the mouse, the parts of the image that you want to keep.
I started at the top left, and clicked and dragged the crop box across the picture. The image will be bright where the box is dragged, and dull where it will be cut out. Preview, as always, is a useful feature. The dull purple on the right side is what I decided to eliminate from the picture, or crop, along with slivers from the top and bottom. It's almost impossible to include every pixel of a picture, so these imperceptible slivers will be omitted as well as the other parts you crop.
You can reset the settings if you're not happy, and accept will save your changes.

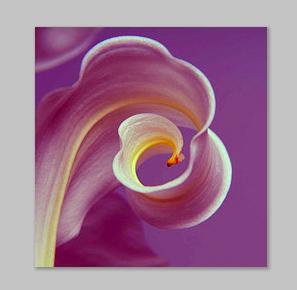
8. Here's the version of the flower with all of the settings adjusted to my liking.

No comments:
Post a Comment