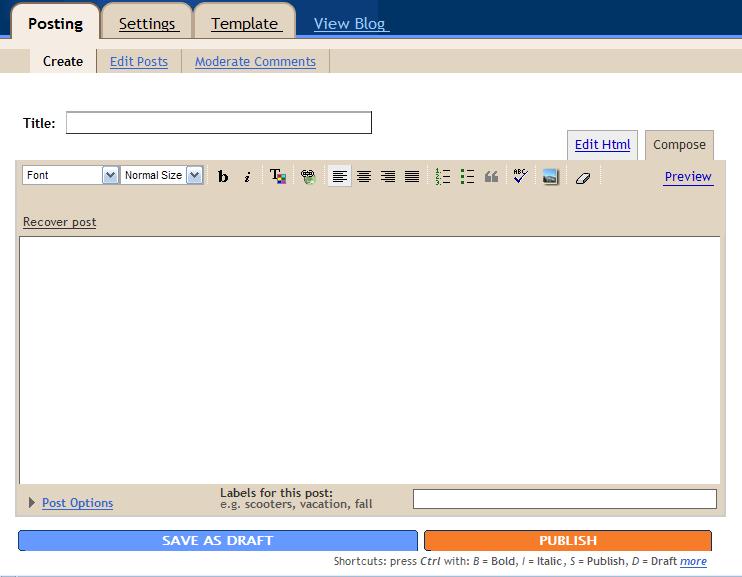
21. Go back to the Dashboard (are you sensing a theme yet?) and click on the Posting | Create tab. You'll notice a rather plain beige window with two smaller tabs labeled Edit HTML or Compose. (The Compose option is the WYSIWYG editor from an earlier section.) Start out in the Compose tab by clicking that link. You'll notice the color of the tab change (and be careful because the dark tan is the focus window which is the opposite of your Posting, Settings, and Template tabs above.)
Along the top of the Compose window are a row of different icons. If you hover the mouse above each one, it will provide an explanation of what each feature does. These are standard icons from programs such as MS Word or the Gmail compose window.
From here you can: bold your text
italicize it
change the color
include a link
(You can do this by typing a phrase, highlighting it with your mouse, and then clicking on the link button. A dialog box will appear and ask you for the link. Type in the address, hit ok, and voila! An instant link.)
Other options are to change the way your text appears on your blog, add bulleted or numbered lists, add quotes, spellcheck your entry, and add a picture. (We'll discuss uploading images and pictures in another posting.) The eraser also lets you erase any formatting which you might have added. Standard text manipulations are also possible here: like ctrl+a to select all of your text, and then delete to start again with a blank window.
Preview is the link to click to see how your post will appear (similar to what you've typed because of the WYSIWYG editor). Ctrl+click this link to show your preview in another window or tab.
While you're writing, if you inadvertantly are on the wrong tab, it's not a problem. You can flip between the two modes without any loss of your posting. Notice the font changes with each tab. Don't worry, your blog will have one look and one font (unless you change the font with a dropdown option on the Compose tab) to it no matter which tab you use to write. If you move away from this page, though, you'll receive a dialog box telling you that you will lose unsaved data and offer you the opportunity to cancel and remain on the page. Before you navigate away from this page, either Save As Draft or Publish.
22. This is a preview of the Edit HTML tab which will be discussed in a later section. Use the Compose tab in the interim, and don't be afraid to post and delete until you feel comfortable making "a real post."

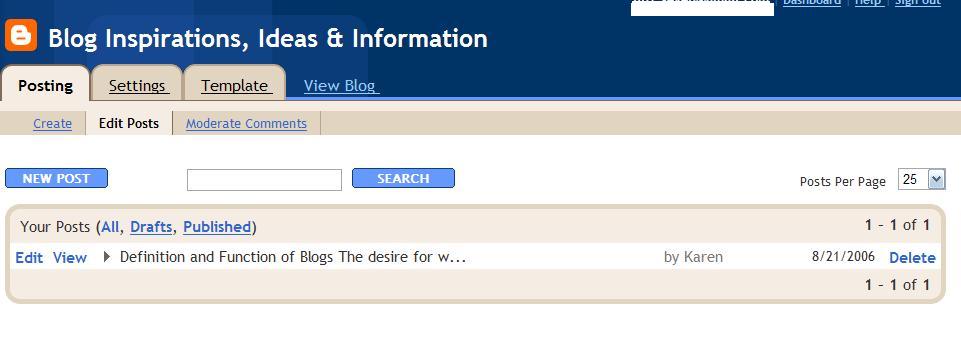
23. Now that you've experimented a bit, Save As Draft. This will bring you to the post management screen. If you've not entered a title, Blogger will nominate the first few words of your entry as the title. You can choose to view all of the posts that you've created, just the drafts, or just the published posts. When this screen was captured, I had only one post finished. Clicking on Edit will bring you right back to the Compose or Edit HTML tabs where you can finish writing.
Clicking Publish will tell you if your post has published successfully, and will offer you the choices to view your blog or to view your blog in a new window. Take a moment and enjoy what you've created! Or click on the Edit button and then delete your post and rewrite it. Both the Edit and Create buttons will take you back to the now familiar Posting tab. Remember, if you don't like what you've posted, there are many ways to delete it.
No comments:
Post a Comment